|
 |
|
 |
|
 |
|
|
Applet
Tutorials: Cube menu
|
|
|
| |
| Cube menu applet |
 |
|
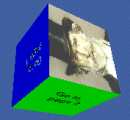
This applet animates a cube texture
mapped with your selection of images. Although at most
you can apply 6 different images to 6 faces of the cube,
only 3 images, each of which is mapped on two faces
of the cube, work well. This reduces the total download
size in half apart from .class and .html files.
Each face of the cube can be associated a unique URL,
so this cube works as a menu with up to 6 different
designations.
[For more technical
information about the available parameters, click
here.]
Most parameters are self-explanatory
and you can always see brief description of each parameter
by moving the mouse pointer over the
wizard.
|
 |
Set your
choice of images for each face of the cube. The
number of images can be anything up to 6, but I
recommend you 3 or 6. |
|
You can even set only 1 image
for all faces, but the result won't be breathtaking.
All images must be gif or jpeg
formatted and the image size must be 128*128 or
256*256. No other sizes are allowed. In addition,
you can't mix these two different sizes of images.
If you choose a 128*128 image for a face, the
rest of the faces must be associated with 128*128
images in size. The same goes to 256*256 pixel
images.
When you set all faces with images,
then you can associate each face with a unique
link and a status message, which is displayed
at the bottom of the browser window when a mouse
pointer is over a linked face.
|
 |
Next, decide the applet
size and the resolution, which
enlarges the internally calculated image
and works as a zooming factor. Set it at
1, if you want the best result.
Then, you set either background
colour or background image. They
are exclusively applied. If you set background
image, background colour will be dismissed.
If you would like the menu
to appear in a small new window, check "Float
mode" box.
|
|
|
You can define the rotation velocity (x, y,
z) of the cube while your mouse pointer doesn't
control it.
Then you decide if textscroll
function is enabled by checking "Enable
textscroll" box.
An important parameter called
"Clear background" should always
be enabled. Without this function, you can't see
a cube as cube should be. The area within a cube
rotates is painted as the motion continues and
looks awful! So, don't forget to check this parameter.
|
| Floating
menu mode |
| If you have selected floating menu
mode, a new configurator appears when you click
"Next" button. (See below.) When
you activate this mode, the applet size itself can
be as small as 1 pixel, but MUST NOT be zero so
as to embed the applet to your HTML document. |
 |
| Set the floating window size (Width,
Height) and give the initial position when a window
first appears. You can set the name of the window.
If you would like to see the menu window always
appear on top of other windows, check "Always
on top box", otherwise leave it unchecked. |
|
|
|
|
We have only discussed about the cube
menu specific parameters. For generic parameters, please
read wizard section.
Proceed to the
textscroll menu if you have checked the textscroll
box; otherwise go to the expert
menu.
|
|
|
|
|
|
| |
|
 |
|